
Homemade Sourdough Pita Bread: Easy Recipe & Tips

The smell of sourdough pita bread baking in my kitchen reminds me of my grandmother’s bakery. Each pita, golden and soft, tells a story of tradition and patience. Making homemade pita is more than baking—it’s about connecting with a long-standing culinary tradition.
Making sourdough pita at home might seem hard, but it’s actually quite simple. With a few techniques and some practice, you can make pitas as good as those in restaurants. This guide will show you how to make perfect sourdough pita bread, from starting your starter to getting that perfect pocket.
Table of Contents
Key Takeaways
- Sourdough pita bread offers a unique tangy flavor profile
- Natural fermentation enhances digestibility and nutrition
- Homemade pita allows complete control over ingredients
- Creating pitas is easier than most home bakers imagine
- Fresh, warm sourdough pita beats store-bought every time
Understanding Sourdough Pita Bread
Sourdough flatbread is a special tradition that turns simple ingredients into something nutritious and tasty. Middle Eastern bread is known for its versatility. Sourdough pita takes this to a new level.
The magic of fermented bread is its complex flavors and health benefits. Unlike regular pita, sourdough is fermented naturally. This makes it easier to digest and more flavorful.
What Makes Sourdough Pita Special
Sourdough pita is special for many reasons:
- It’s easier to digest because of natural fermentation
- It has a deeper, more complex taste than regular pita
- It’s more nutritious
- It has a lower glycemic index
History and Cultural Significance
“Bread is the king of the table and all else is merely the court that surrounds the king.” – Louis Bromfield
Middle Eastern bread traditions are thousands of years old. Pita has been a key part of Levantine cuisine. It’s more than food; it’s about community, hospitality, and identity.
Benefits of Making Your Own
Homemade sourdough pita has many benefits:
- You have full control over what goes into it
- You get fresh, preservative-free bread
- It’s cheaper than buying it
- You enjoy the traditional baking process
By making sourdough pita, you’re not just baking bread. You’re connecting with a rich tradition that spans generations.
Essential Ingredients for Perfect Pita

Creating the perfect sourdough pita starts with choosing high-quality ingredients. Your journey in the artisan bakery world begins with knowing the key ingredients. These ingredients turn simple items into delicious whole wheat pita bread.
The foundation of exceptional pita lies in a few critical ingredients:
- Active Sourdough Starter: The heart of your bread, providing distinctive flavor and natural leavening
- High-protein bread flour
- Fresh, filtered water
- Sea salt
- Extra virgin olive oil
Whole wheat pita adds a nutritious twist to traditional recipes. It brings depth of flavor and boosts the bread’s nutritional value. Choose freshly milled, unbleached whole wheat flour from local mills or specialty baking suppliers.
“The quality of ingredients determines the soul of your bread” – Artisan Baker’s Wisdom
When picking ingredients, focus on freshness and purity. Your sourdough starter should be active and bubbly, showing it’s ready to make those signature pita pockets. Organic ingredients can make your baking go from good to extraordinary.
Pro tip: Try different flour ratios to find your perfect whole wheat pita mix. Begin with a 50/50 mix of bread flour and whole wheat flour. Then, adjust to match your taste preferences.
Equipment and Tools Needed
Making authentic levantine cuisine needs the right kitchen tools. To make sourdough pita bread, you need specific equipment. This equipment helps you get perfect results every time. Choosing the right tools is key to the bread-making process.
Before starting your levantine cuisine journey, get these essential tools. They will make your baking easier.
Essential Baking Tools
- Digital kitchen scale (for precise measurements)
- Large mixing bowl
- Rolling pin
- Baking surface (pizza stone or cast-iron skillet)
- Clean kitchen towels
Optional Equipment for Enhanced Results
These tools are not necessary but can improve your sourdough pita bread:
- Stand mixer with dough hook
- Dough scraper
- Infrared thermometer
- Proofing basket
Surface Preparation Tools
| Tool | Purpose | Recommended Type |
|---|---|---|
| Baking Stone | Creates crispy exterior | Unglazed ceramic |
| Parchment Paper | Prevents sticking | Unbleached |
| Silicone Mat | Easy dough handling | Non-stick surface |
Quality tools make baking at home better. They bring the real taste of levantine cuisine to your kitchen.
Preparing Your Sourdough Starter
Creating a vibrant sourdough starter is key to making delicious fermented bread. Your starter will add life and flavor to your homemade pita bread. To start, you need patience, consistency, and to understand fermentation.
To begin, you’ll need just two things: flour and water. Organic whole wheat or rye flour works best. These flours have more natural yeasts and bacteria, starting the fermentation.
- Use a clean glass jar with a loose lid
- Mix equal parts flour and water by weight
- Stir until no dry flour remains
- Keep at room temperature (70-75°F)
Feeding your sourdough starter is vital for its health. In the first week, you’ll need to discard and replace half the mixture daily. This helps build a strong microbial community, creating tangy flavors in your bread.
Look for signs of an active starter:
- Bubbles throughout the mixture
- Doubled volume within 4-8 hours after feeding
- Pleasant, slightly sour aroma
- Soft, bubbly texture
Your starter is ready when it doubles in size and bubbles vigorously. Pro tip: Always use your starter at its peak activity for the best pita bread results!
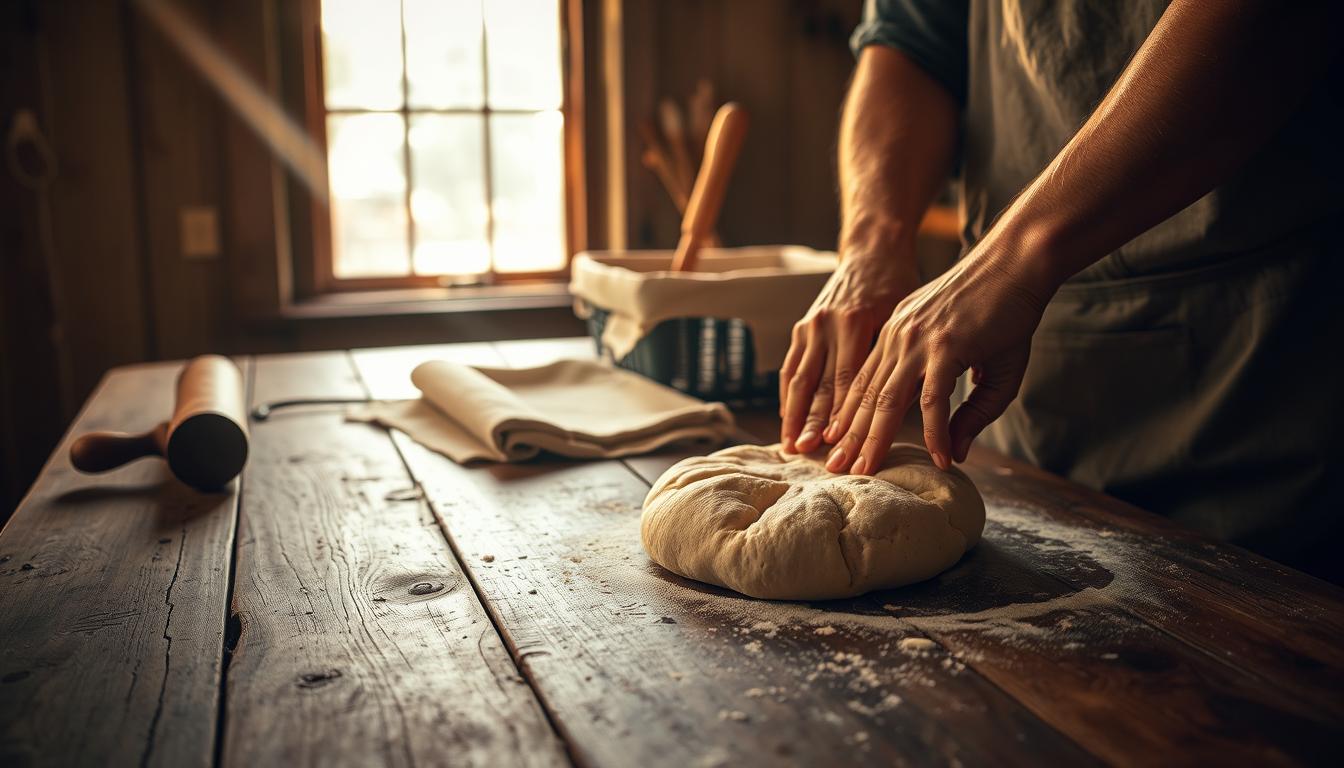
Mixing and Kneading the Pita Dough
Making the perfect sourdough pita bread begins with mixing and kneading. In an artisan bakery, this step is key for the right texture and flavor. Your vegan pita dough needs careful attention and technique.
Initial Mixing Process
Start by mixing your ingredients in a big bowl. The goal is to mix them until they become one dough. Here’s how:
- First, mix the dry ingredients together
- Then, add the wet ingredients slowly
- Keep mixing until you get a shaggy dough
- Let it rest for 15-20 minutes
Kneading Techniques
Kneading is important for developing gluten and the pita’s texture. You can use two main methods:
- Hand Kneading:
- Work the dough on a clean surface
- Push and fold it over and over
- It should become smooth and elastic
- Machine Kneading:
- Use a stand mixer with a dough hook
- Mix on medium speed
- Knead for 8-10 minutes
Visual Cues for Perfect Dough
Your vegan pita dough should look and feel certain ways. Look for these signs:
- It should have a smooth, slightly tacky surface
- It should be elastic when stretched
- It should pass the windowpane test (thin, translucent when stretched)
- It should hold its shape well without being too dry
Remember, practice makes perfect. Each batch of sourdough pita will improve your skills and understanding of bread making.
Fermentation and Proofing Guide
Creating delicious fermented bread like sourdough flatbread starts with understanding fermentation. Your sourdough pita dough needs careful attention during this stage. This is when it develops rich flavors and perfect texture.
The fermentation process lets natural yeasts and bacteria work their magic. This time is when your sourdough flatbread dough gets complex flavors. It also becomes more digestible and nutritious.
Fermentation Timing and Temperature
Several key factors affect optimal fermentation:
- Room temperature fermentation: 4-5 hours at 70-75°F
- Cold fermentation: Overnight in refrigerator (36-40°F)
- Ideal humidity: 75-80%
Cold fermentation is great for sourdough flatbread. It lets the dough rest slowly in the fridge. This develops deeper, more complex flavors that make your homemade pita bread even better.
Signs of Proper Fermentation
Look for these signs that your fermented bread is ready:
- Noticeable expansion of dough volume
- Bubbles forming throughout the mixture
- Slight tangy aroma
- Soft, pillowy texture
Mastering fermentation takes practice. Each batch of sourdough flatbread teaches you more. You learn about the dance of yeast, bacteria, and flour.
Shaping Your Sourdough Pita Bread
Making the perfect homemade pita needs precision and care. The shaping process is key to creating those delightful pita pocket bread. These will impress your family and friends. Let’s explore the techniques to turn your sourdough into authentic, pillowy pockets of deliciousness.
Dividing the Dough with Precision
Your sourdough pita journey starts with careful division. Follow these steps for uniform pockets:
- Use a sharp bench scraper or knife to divide the dough
- Weigh each portion to maintain consistent size
- Aim for approximately 100-120 grams per pita
Master Rolling Techniques
Rolling out your homemade pita needs a gentle touch. Here’s how to get the perfect thickness:
- Shape each dough portion into a smooth ball
- Let the dough rest for 10 minutes to relax the gluten
- Use a wooden rolling pin on a lightly floured surface
- Roll from the center outward in multiple directions
Size and Thickness Guidelines
The secret to an authentic pita pocket bread is consistent thickness. Aim for about 1/4 inch thick. Each pita should be roughly 6-8 inches in diameter. Too thin, and it might tear; too thick, and it won’t have that signature pocket.
Pro tip: Rotate the dough slightly with each roll to maintain a circular shape and even thickness.
Practice makes perfect when shaping your sourdough pita. Don’t get discouraged if your first attempts aren’t flawless. Each batch will improve your technique and bring you closer to pita perfection.
Baking Methods and Temperature Control
Baking middle eastern bread is all about precision. You need to control temperature and technique well. This is how you turn simple dough into a puffy, tasty flatbread.
High heat is key for authentic pita bread. Preheat your oven to 475°F (245°C). This heat is perfect for creating steam and pockets in your bread.
- Baking Stone Method: Provides even heat distribution
- Cast Iron Skillet Technique: Creates crispy exterior
- Direct Oven Rack Baking: Allows maximum air circulation
Choosing the right baking surface is crucial. A preheated baking stone mimics a tandoor oven, giving intense heat. A heavy cast iron skillet can also work well.
Place your pita on the hot surface for 2-3 minutes. Watch as it turns golden-brown and forms a beautiful pocket.
Pro tip: Keep your oven door closed during baking to maintain consistent high temperature!
Try different techniques to find your favorite way to bake pita. Each method adds unique qualities to your homemade bread, making it truly special.
Creating the Perfect Pocket
Making the perfect pita pocket bread needs precision and a grasp of baking science. Your homemade pita can turn into a perfectly puffed pocket with the right techniques.
Temperature Magic for Pocket Formation
The secret to a great pita pocket is in managing heat. Your oven should be preheated to a scorching 450-500°F. This high temperature makes the dough puff up into a pocket.
- Preheat your baking stone or steel for at least 30 minutes
- Ensure consistent oven temperature
- Use an instant-read thermometer to verify heat levels
Timing and Technique Secrets
Timing is key when baking homemade pita. Most pitas puff up in 2-3 minutes in a hot oven. Look for the dome-like shape that signals a perfect pocket.
Troubleshooting Puffing Challenges
Not every pita will puff perfectly, but don’t worry. Several things can affect how well it puffs:
- Dough hydration: Too dry or too wet dough can stop puffing
- Uneven rolling can prevent uniform steam buildup
- Incorrect oven temperature disrupts pocket development
“The perfect pita pocket is a delicate dance of temperature, technique, and timing.” – Artisan Bakers’ Guild
With practice and patience, you can make consistent, pillowy pita pocket bread. It will rival what professional bakeries offer.
Storage and Reheating Tips
Keeping your homemade sourdough pita bread fresh is important. It’s all about the right storage and reheating. Fans of Levantine cuisine know this well.
Short-Term Storage Strategies
- Store sourdough pita bread in an airtight container
- Keep at room temperature for up to 3 days
- Place a clean kitchen towel inside the container to absorb moisture
Long-Term Preservation Methods
Freezing is the best way to keep your pita bread fresh for longer. Wrap each pita in parchment paper or plastic wrap. Then, put them in a freezer-safe bag. This way, your pita can stay good for up to 2 months.
| Storage Method | Duration | Recommended Technique |
|---|---|---|
| Room Temperature | 3 days | Airtight container with towel |
| Freezer | Up to 2 months | Individually wrapped |
Reheating Your Sourdough Pita
Here’s how to make your pita soft and fluffy again:
- Oven method: Preheat to 350°F, wrap in foil, heat for 5-7 minutes
- Skillet technique: Warm on medium heat for 30-45 seconds per side
- Microwave: Best for quick warming, but may reduce texture quality
By using these tips, your sourdough pita will stay delicious. It will taste just as good as when it first came out of the oven.
Serving Suggestions and Pairings
Your homemade sourdough pita bread opens up a world of culinary possibilities in Levantine cuisine. This versatile middle eastern bread can transform simple meals into extraordinary dining experiences.
Classic pairings bring out the best in your freshly baked pita. Try these delicious serving suggestions:
- Dip into creamy hummus or smoky baba ganoush
- Create Mediterranean-style mini pizzas
- Stuff with crispy falafel or tender shawarma
- Use as a wrap for grilled vegetables
- Serve alongside mezze platters
Your sourdough pita bread works perfectly in both traditional and modern recipes. Slice it thin for appetizers, tear it for salads, or use it as a base for creative sandwiches. The tangy sourdough flavor adds depth to every bite of your middle eastern bread creation.
Experiment with sweet and savory combinations. Try spreading some honey and goat cheese, or use it as a base for a breakfast sandwich with scrambled eggs and za’atar spice.
Pro tip: Warm your pita bread briefly before serving to enhance its soft texture and bring out the rich sourdough flavor.
Conclusion
Making homemade sourdough pita bread is more than a skill—it’s an art. It connects you with traditional baking. Your kitchen will become a personal bakery, offering delicious results with each try.
Practice is key to perfecting your sourdough pita bread. Every batch teaches you something new. Start with patience and enjoy the learning process. Your homemade pita will get better, more flavorful, and beautifully crafted over time.
The joy of pulling fresh, puffy sourdough pita bread from the oven is unmatched. With time, you’ll understand dough behavior, temperature, and proofing. Your dedication will reward you with bread that impresses everyone.
Remember, sourdough pita bread is about the whole experience, not just the end product. Keep trying new things, stay curious, and enjoy the tasty results of your baking journey.
Share Your Creation!
I’d love to see how your Sourdough Pita Bread turns out! If you make this recipe, please leave a comment and rating below. You can also share your creation by tagging me on pinterest @bake_iteasy with the hashtag # Sourdough Pita Bread.
Did you try our recipe ?
There are no reviews yet. Be the first one to write one.